Surgical Essentials
View answers to our most asked questions about Surgical Essentials
Bone & Membrane fixation
To remove tacks you can use root fragment forceps; easy and precise.
You may cut and shape the titanium mesh with Beebe scissors (straight or curved). Once the mesh has been trimmed to the desired size, it is important to round all the edges to ensure that they are not sharp.
The offset tack applicator will allow you the room to position the tack in the posterior mandible or maxilla. NOTE If you are having trouble getting the tack through the dense bone of the posterior mandible, we recommend the use of a 3 or 4mm wide-head-titanium-screw instead of a membrane tack (which can bend or break with dense bone).
In most cases, the 8mm or 10mm screw lengths will allow you to go through the Raptos® bone block and into the recipient site.
Since all our Screws are made of titanium alloy, they are therefore ideal for use with our titanium mesh membranes.
Align the top of the body with the desired height of your membrane placement. The screw threads should be a minimum of 2-3mm into the recipient’s bone to be properly engaged. Back-fill with grafting material to height of the tenting screw body. Place the membrane (with pilot holes) and align the screw head opening. Place the head into tenting screw body while stabilizing the membrane.
It is recommended to drill pilot holes for the 2mm screws. NOTE Pilot holes can also be made when utilizing screws as tenting screws or to fixate a traditional membrane.
The 2mm diameter screws are your 'rescue' screws if the osteotomy you performed with the 1.6mm screws is too large, or if for some reason a smaller diameter screw cannot engage properly. A larger diameter screw can be used to provide more rigid fixation.
All components of the Tack kit are shipped non-sterile and must be sterilized before use. NOTE Autoclave 15 minutes at 250° Fahrenheit (120° C)
The latch-attachment components can be used at a to either drive-in or remove the screws.
All screws and tacks, included in the Citagenix Screw & Tack Kit, are made of grade 5 titanium alloy (ASTM F 136).
The cap that comes with the tack applicator (regular version or offset version) is used to protect the tip from bending or opening during sterilization. Keeping the cap in place during sterilization ensures the applicator fits perfectly over the tack head and engages it when picking it up. TIP The cap is also handy for tacks that do not fully seat. Put the tack applicator cap on and apply pressure against the head of the tack to get it fully seated.
Pull down the ring at the top of the handle to engage the shaft. Releasing the ring will allow the Driver to lock the driver shaft into place. Pulling the ring back again will release the shaft.
Once your Screw or Tack is inserted, slightly tilt the Driver on any side to release the Driver. It's that simple.
The black silicone cap goes on top of your Driver and helps protect the Driver when inserting tacks by tapping on it with a mallet. This also makes it more comfortable for the patient.
These autoclavable blocks are designed to organize all you need for bone and membrane fixation. Both the regular Screw & Tack Kit block and the Mini Tack Kit block are meant to be sterilized with all components enclosed.
The bottom right corner of the full storage block has a measuring tool for each screw diameter and length. Use the Screwdriver shaft to engage the screws so that you can bring them to the measuring tool on the storage block.
Devices
The Penguin RFA or the Penguin II, helps dentists reliably and affordably measure and monitor implant stability. The Penguin measures implant stability providing dentists with an Implant Stability Quotient value (ISQ) to support the decision of when to restore the implant. Having accurate ISQ measurements gives clinicians confidence when determining safe loading times assessing osseointegration particularly in patients with compromised bone by recognizing if an implant might not be successful. The biggest benefits the Penguin provides are that it is an easy, reliable and affordable way to measure implant stability. Using scientifically backed methodology to support the clinician's decision of when to restore the implant. Here are some of the key product highlights: • Accurate ISQ measurement • Easy to use • Much lower cost than competing ISQ devices • Reusable MulTipeg™ guaranteed for 20 autoclave cycles • Cordless, lightweight We know you'll find the Penguin RFA to be an excellent instrument that will help you become more confident in managing your implant cases.
There's an associated MulTipeg™ for most popular titanium and ceramic implant brands and platforms. Visit the MulTipeg™ product page on our website under the Surgical Essentials category and under the Availability tab you will find a search tool to find the MulTipeg™ for your implant system.
The torque method of identifying an implant that is ready to load can affect the healing process. If an abutment connection is placed and a torque stress is applied during this moment of osseointegration, a fracture may occur. Therefore the introduction of the Penguin RFA or the Penguin II devices, will eliminate the chance of fracture or damage due to torque stress during the healing process.
The Penguin RFA or the Penguin II, allows surgeons to measure the stability of a patient's implant. You can estimate osteointegration securely and reliably. It allows you to have several values along the healing process. Finally, it lets the surgeon identify an implant that might be failing and change the treatment protocol earlier based on this information.
Here are a few helpful hints for handling inconsistent values when using the Penguin RFA or the Penguin II: • Check to see if you are using the correct MulTipeg™ type for the implant system and implant platform size. • Back out the MulTipeg™ and check for any seating interference from bone spicules or soft tissue tags. Reinsert the MulTipeg™ turning it in finger-tight and retake the ISQ value. • If the same MulTipeg™ has been used more than 20 times, the threads may be worn and the MulTipeg™ should be replaced. • Ensure that the MulTipeg™ is fully seated, back it out and try to reinsert it until you can no longer rotate the test peg.
Fully charged batteries will provide more than one hour of continuous measurements. Since the Penguin RFA is normally only used for short periods of time, it can be used for many sessions before recharging.
Penguin RFA or Penguin II, used together with a reusable MulTipeg™ gives essentially the same ISQ readings as Osstell® ISQ used with disposable SmartPegs. However, MulTipegs are calibrated against a common standard, which results in comparable ISQ values between different implants. MulTipegs™ must be used to get the benefits of the calibrated system.
MulTipegs are made from durable titanium with sealed magnets, are re-usable up to 20 times and can be autoclaved to make them sterile. They are calibrated against a reference to ensure consistent ISQ values, making it easier to compare different implant systems. The laser-marked MulTipegs are tissue-friendly and leave no foreign materials inside the implants.
Penguin RFA or Penguin II, uses autoclavable titanium test pegs that can be used multiple times on multiple patients. Guaranteed for a minimum of 20 uses. Other pegs are aluminum test pegs that are single use only.
Using, washing and autoclaving a MulTipeg™ leads to some wear and it will eventually need to be replaced. The number of uses differs depending on how it is handled, but MulTipeg™ is validated for 20 autoclave cycles.
A sterile cover can be used with the Penguin RFA instrument in a sterile environment. Both MulTipeg™ and MulTipeg™ Driver are autoclavable.
Penguin RFA and Penguin II, have been developed by the original developers of the Osstell® device. As much research on ISQ and Resonance Frequency Analysis applies to Penguin devices as Osstell®.
Measuring implant stability with the Penguin RFA or the Penguin II, allows virtually no forces being applied to the implant. This is to avoid the chance of damaging new implants or their osseointegration progress.
MulTipeg™ is made of titanium, a highly biocompatible material that is friendly to the implant being tested. Titanium and titanium alloys are similar metals and only this substance comes in contact with the implant while taking RFA measurements. Resonance frequency analysis (RFA) provides a non-invasive, objective method of assessing implant stability over time. This technology has been studied and utilized in implant dentistry for more than 20 years and can be defined as the measurement of the frequency at which an object vibrates.
Resonance frequency analysis (RFA) is a simple and non-invasive method for testing implant stability. This technique provides information about the state of the implant-bone interface. Measurements can be taken with Penguin RFA or Penguin II at the time of implant placement to obtain a baseline value, as well as during follow-up treatment to monitor osseointegration and decide when to load the implant. Resonance frequency analysis (RFA) provides a non-invasive, objective method of assessing implant stability over time. This technology has been studied and utilized in implant dentistry for more than 20 years and can be defined as the measurement of the frequency at which an object vibrates.
The Penguin RFA or Penguin II, is an innovative device that helps dentists reliably and affordably measure and monitor implant stability. The Penguin uses Resonance Frequency Analysis (RFA), to predictably measure implant stability providing dentists with an Implant Stability Quotient value (ISQ) to support the decision of when to restore the implant. Having accurate ISQ measurements gives clinicians confidence when determining safe loading times assessing osseointegration particularly in patients with compromised bone by recognizing if an implant might not be successful. Scientific literature on RFA indicates that an ISQ greater than 70 is considered highly stable while an ISQ less than 60 is considered low stability. Taking a baseline reading at implant placement and then, if appropriate, successive ISQ measurements during healing provides the clinician with valuable information about the integration of the implant. The Penguin RFA or Penguin II is easy to use. First, to activate the device, simply press the black control button. The twin displays will light up with two dashes indicating that the unit is ready to take a measurement. With the MulTipeg™ threaded into the implant, with a provided driver, the operator holds the Penguin device at an angle near the tip of the MulTipeg™. A signal from the instrument tip causes a magnet inside the MulTipeg™ to resonate a frequency, which is detected by the device. The resulting ISQ value appears immediately on both displays. It is advisable to take at least two measurements, buccal and lingual. There's an associated MulTipeg™ for most popular titanium and ceramic implant brands and platforms. The biggest benefits the Penguin device provides are that it is an easy, reliable and affordable way to measure implant stability. Using scientifically backed methodology to support the clinician's decision of when to restore the implant.
Penguin RFA or Penguin II, measures implant stability and osseointegration to enhance decisions about when to load. Especially important when using protocols with shorter treatment times or treating high risk patients. Penguin RFA or Penguin II's quick response and no contact measurement creates no stress on the healing bone. Resonance frequency analysis (RFA) provides a non-invasive, objective method of assessing implant stability over time. This technology has been studied and utilized in implant dentistry for more than 20 years and can be defined as the measurement of the frequency at which an object vibrates.
Sutures
PFOA (Perfluorooctanoic Acid) is a synthetic compound that is used in the process of making PTFE (Polytetrafluoroethylene). So when "PFOA Free" is mentioned, it usually means the PTFE was made without the use of PFOA in the manufacturing process. To address health and environmental concerns associated to PFOA, many manufacturers of PTFE products have transitioned to PFOA-free manufacturing processes. By eliminating PFOA from the production process, manufacturers can eliminate the potential risks to human health and the environment associated to PFOA. Additionally, the shift towards PFOA-free alternatives aligns with regulatory requirements and consumer preferences for safer and more environmentally friendly products.
Biotex™ can be left in the surgical site for 29 days. The Biotex™ PTFE sutures can be left in the surgical site up to 29 days. The softness of the monofilament in the Biotex™ PTFE suture creates little to no tissue irritation.
The importance of no memory with the Biotex™ sutures. Because it has no memory, the Biotex™ suture can be removed from the package without coiling, keeping the suture straight. Less handling allows the surgeon to focus on getting a nice clean suture line, to prevent sutures from tangling when they are pulled through the tissue.
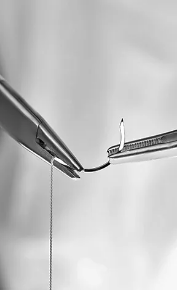
The Biotex™ sutures are made from a non-resorbable PTFE monofilament, with a stainless-steel surgical needle that is connected to the suture.
Non-wicking means that it does not absorb, therefore plaque and bacteria will not accumulate around the Biotex™ suture.
All Biotex™ needles are considered premium because of their precision slim-cut triangular needle for a small penetration area and smooth suturing.
Composition of the Monoglyc™ suture. Monoglyc™ is a sterile synthetic absorbable monofilament surgical suture produced from a copolymer of glycolic acid and e-caprolactone. e-Caprolactone or simply caprolactone is a lactone possessing a seven-membered ring. Its name is derived from caproic acid. This colorless liquid is miscible with most organic solvents and water. It was once produced on a large scale as a precursor to caprolactam.
Monoglyc's tensile strength versus absorption/resorption time. One place references "Maintains 50% tensile strength for 14-28 days" another says "Absorbable in approximately 4 weeks (5/0)" and yet another states "Absorption is fully complete in approximately 90 days". Clinically, what does all of this mean? The 90 days time frame is for the Monoglyc suture material to be 100% absorbed by the body so that there is no trace of the suture material. The 4-week time frame is for the strength of the suture material to be sufficient to keep the flap closed without tension before it disintegrates further. The 14-28 days time frame is the time that the suture retains 50% of its tensile strength. 90 days - 100 % absorption 4 weeks - enough strength to keep flap and incision line stable 14-28 days - the range of time depending on the suture size Did you know? The Monoglyc sutures will absorb in five weeks for the 4.0, four weeks for the 5.0, and three weeks for the 6.0.
Features of Monoglyc™ sutures that minimize tissue damage. The Monoglyc™ suture glides smoothly through the tissue because of the single strand monofilament construction aided by the super sharp needles. Tissue trauma from suturing is virtually non existent with Monoglyc™, and the monofilament structure prevents bacterial wicking. Monoglyc™ smooth surface provides excellent handling properties, combined with the sharp and high quality needle allow for atraumatic passage through tissue.
Characteristics of Monoglyc™ sutures. Monoglyc™ is dissolved by the body’s own processes. No foreign material remains in the body No removal is necessary - Absorbable in approximately 4 weeks (5/0) Smooth Surface Little tissue damage No bacterial accumulation and no plaque buildup No capillarity (volume of fluid absorbed along the suture line)
The Monoglyc™ suture is a monofilament suture that prevents bacterial wicking, as opposed to a braided suture that allows for a perfect surface for bacteria to grow.
The Monoglyc™ sutures are available in packages of 24 units with six different sizes.
Monoglyc™ sutures will not resorb prematurely which ensures that your incision line and tissue flap remains closed long enough for proper healing and closure. Monoglyc™ sutures behave like non-resorbable PTFE without the need to remove the sutures.
It takes 90 to 110 days for the Monoglyc™ sutures to completely absorb and no longer be noticeable.
For those who are used to PTFE sutures, sometimes if the suture is left in for a prolonged period, it tends to get buried, making it difficult to retrieve. On the other hand, Monoglyc™ will last quite some time because it is 100% resorbable and has added PCL polymer although you do not have to worry about having to remove the suture.
All Monoglyc™ needles are considered premium because they are smaller and sharper than conventional suture needles. However, the two Monoglyc™ premium sutures have an even sharper reverse cutting needle.
Wound Dressings
NeoCote and NeoTape wound dressings only last between 1 and 2 weeks, which is not long enough to protect the bone graft. Depending on the acidity of the patient's saliva, NeoCote and NeoTape wound dressings can resorb even faster, leaving your bone graft exposed to tissue growth, bacteria and food. Neomem® and Neomem® FlexPlus membranes contain cross linked collagen fibres with the longevity to protect the bone graft long enough for new bone to replace the graft.
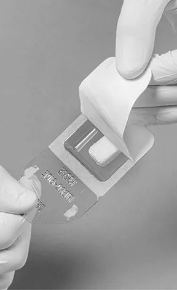
NeoTape, NeoCote and NeoPlug usually resorb in 1 to 2 weeks. They are meant to be used as wound dressings, not as membranes (that take longer to resorb).
Wound dressings (NeoTape, NeoCote, NeoPlug) are not meant to be used as membranes as they are too porous. They do not act as a barrier and are resorbed within 1 to 2 weeks.
This will depend on the clinician, patient requirements and what they are trying to accomplish; some doctors will use them interchangeably. We recommend that NeoTape be used in the following procedures: covering a palatal donor site covering suture sites placing over burn sites as a soft cover The thin tape-like design helps in areas that require a more intricate procedural covering. We recommend that NeoCote be used in the following circumstances: covering Periodontal surgical wounds dealing with and covering oral ulcers, either non-infected or viral. Dealing with denture sores as a cover under the overriding denture, the thicker NeoCote, with its spongier shape, helps protect soft tissue better in some cases than NeoTape.
Many articles have discussed the use of a collagen plug, such as NeoPlug, during ridge preservation procedures. The authors conclude that sufficient short term coverage and protection is achieved provided that there is sufficient thickness and quality of the buccal bone. Extraction sockets with good quality bony walls (typically referred to as a 5 walled socket) show the best results for collagen plug use. CAUTION As soon as any bony wall is compromised (thin or missing), then a membrane is recommended for long term protection and containment of the graft material such as Raptos Allograft particulates.
One of the most common uses of NeoPlug is for molar extractions. You can insert one or more for hemostatic control. NeoTape and NeoCote are often used in palatal wounds or oral abscesses. They can also be used on top of a membrane as an external covering, on burns or periosteal defects.


